These Matching Doll PJs, made in under an hour, are a quick way to make the doll lover in your life smile wide this holiday season.

One thing my daughter has frequently asked for is matching doll pjs for her 18″ American Girl style doll. It all started when I made her a Christmas nightie one year, but didn’t have time to make one for her doll (even though I had originally planned to, which she never let me forget). Finally, this year, I made them both an adorable nightie so that they can match while opening presents!
Two things make this project ridiculously easy:
- Using a Cricut Maker to cut the fabric for the “skirt” portion of the doll nightie.
- Using a plain, premade shirt for the “top” portion of the nightie (both doll and girl).
When I say ridiculously easy, I mean it. This project comes together in under an hour – the hardest part is pinning it together so that it doesn’t end up inside out. (Not that I know from experience or anything.)
Matching Doll PJs – The Supplies
Here is the supply list to make your own matching doll pjs. (Affiliate link to products used are included for easy shopping!)
- premade shirts for child and doll
- flannel fabric (see below for formula to determine how much you will need)
- bias hem tape
- coordinating thread
- Cricut iron on
You will also need the following tools:
- Cricut Maker
- EasyPress
- Sewing machine
The process for making the doll and girl nighties are exactly the same, just the size will vary. I measured the length of a current fitting dress for my daughter, and also measured the length of the doll dress. Add 0.5″ for a seam allowance. To determine width (the side that will go around the waist), I measured the shirt width, multiplied it by 2 (for front and back), multiplied again by 1.5 (to allow for a small gather in the front), and added 0.5″ for a seam allowance. (You can find the cut files I used in Design Space here.)
Matching Doll PJs – The How To
I placed the shirts on the dolls and marked (with the Cricut washable marker) where I would like the seam. Don’t forget to leave a 0.5″ seam allowance! I like to cut the doll shirt below the last piece of velcro, which will make it easier to take on and off the doll.

Next, I cut the doll skirt on the Cricut Maker by using the Shapes function to create a rectangle. My “skirt” measured 17″ (width) x 5.5″ (height). Insert the rotary blade and hit “Make”. You can also cut the piece for the girls pjs now, but you will likely have to cut this one by hand. The last cut is to slice the shirts off at the point you marked (you can do this now, or after you finish with the skirt).
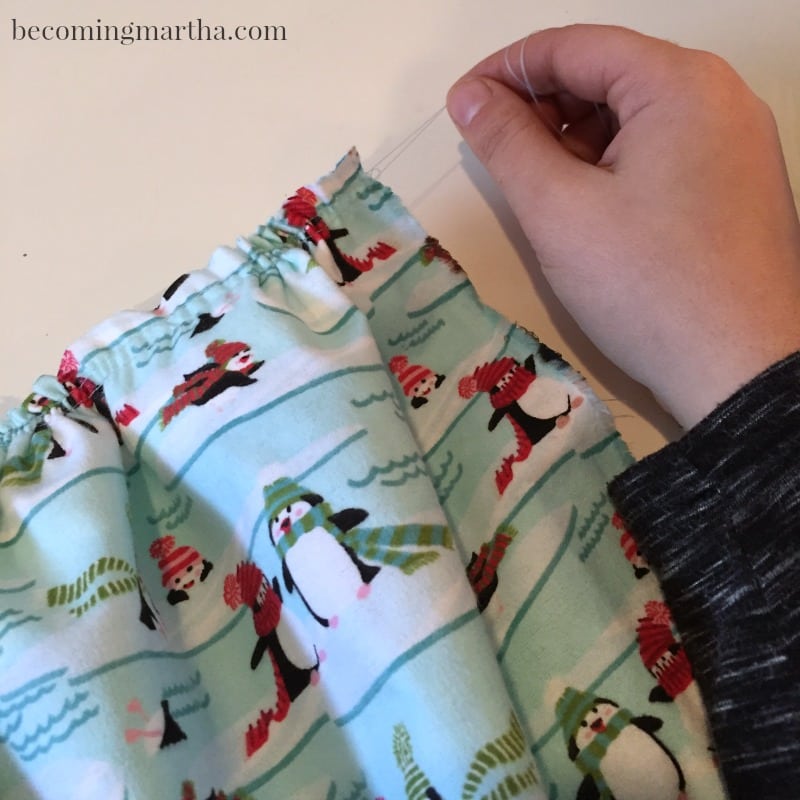
Set your sewing machine to the longest straight stitch setting. Without backstitching, run two parallel stitch lines through one width (the long side) of the fabric. Leave long tails on both ends. Grab the tails of one end, separate the upper and lower threads, and pull just the upper threads while sliding the fabric towards the center to create a gather. Bunch the fabric until your skirt measurement equals double the width of the shirt. (For more info, you can see how I gathered the skirt of another dress in this post.)

Place the skirt and shirt right side together, with the gathered end pinned to the sliced end of the shirt. Run through your sewing machine, making sure the seam is below the gathering seams.
Run through your sewing machine, and turn right side out.
Matching Doll PJs – Make it Pretty
You could do a basic hem on the bottom, but I had this matching bias hem tape and it looked adorable on the bottom of the skirt portion.

Also, the shirt portion is really easy to personalize with iron on (heat transfer) vinyl. To achieve the best results that will withstand wash and wear, I really suggest using the EasyPress. It provides a more evenly distributed and regulated heat across the entire surface, which makes it perfect for iron on designs.
I used this “Snow Angel” design from the Cricut Image Library, which involved two layers. I did red on the bottom and a teal glitter on the top. This was the first time I ever layered iron on, but the EasyPress made it a breeze.

Using iron on is such a great way to make matching clothes, even beyond pjs. Grab some black leggings and cut a design for the knees, or add a fun phrase to a boring shirt, or even jazz up a scarf. The possibilities are literally endless.
Now all that’s left to do is have your models walk the runway wearing your designs. Aren’t they cute?
If you don’t have a Cricut Maker or Explore but would love to create fun designs like this for a little cutie in your life, make sure you enter the giveaway below! One lucky winner will walk away with a fabulous gift from Cricut, just in time for Christmas!
This is a sponsored conversation written by me on behalf of Cricut. The opinions and text are all mine.
[…] Skating Dress Matching Doll Nightie Hospital Gown Tae Kwon Do Outfit PJ’s (shown above) Pillowcase Nightgown Leotard or […]